- 1 1. Prerequisite Knowledge: Storage Structure and Mounting in Linux / Ubuntu
- 2 2. Basic Command-Line Methods to Check Disk Space
- 3 3. Checking Disk Space Using GUI Tools (Ubuntu Desktop)
- 4 4. Investigation and Countermeasures When Disk Space Is Low
- 4.1 4.1 Identifying Signs of Disk Space Exhaustion
- 4.2 4.2 Step 1: Check Overall Disk Usage (df)
- 4.3 4.3 Step 2: Identify Which Directories Are Consuming Space (du)
- 4.4 4.4 Step 3: Removing Unnecessary Files and Caches
- 4.5 4.5 Step 4: Addressing Application and Log-Related Disk Growth
- 4.6 4.6 Step 5: Solving the Root Cause with Resizing or Disk Expansion
- 4.7 4.7 Preventing Recurrence with Regular Monitoring
- 4.8 4.8 Summary: Priority Order for Disk Space Countermeasures
- 5 5. Advanced Tips (Useful Techniques and Precautions)
- 5.1 5.1 Automating Regular Disk Checks
- 5.2 5.2 One-Liners to Find Large Files
- 5.3 5.3 Creating Aliases for Frequently Used Commands
- 5.4 5.4 Continuously Monitoring Disk Usage Changes
- 5.5 5.5 Be Aware of Permission Barriers
- 5.6 5.6 Considerations for SSD and HDD Environments
- 5.7 5.7 Turning Disk Management into a Preventive System
- 5.8 Summary
- 6 6. FAQ (Frequently Asked Questions)
- 6.1 Q1. What is the easiest way to check current disk space on Ubuntu?
- 6.2 Q2. How can I check disk usage by directory?
- 6.3 Q3. What is the difference between df and du?
- 6.4 Q4. How can I check disk space using GUI tools?
- 6.5 Q5. What should I delete first when I see a “disk is full” warning?
- 6.6 Q6. Do Snap applications consume a lot of disk space?
- 6.7 Q7. What if /var or /home is too large?
- 6.8 Q8. The du command takes too long. How can I speed it up?
- 6.9 Q9. How can I prevent disk space issues from recurring?
- 6.10 Q10. What options are available for expanding disk space?
- 6.11 Q11. Can I check disk usage without root privileges?
- 6.12 Q12. How can I check disk space on a server without GUI?
- 6.13 Q13. Is there any risk in checking disk usage?
- 6.14 Q14. Are there any tricks to save disk space?
- 6.15 Q15. What are recommended disk monitoring tools?
- 6.16 Final Summary
1. Prerequisite Knowledge: Storage Structure and Mounting in Linux / Ubuntu
When checking disk space on Ubuntu (and most Linux-based operating systems), there are several fundamental structural concepts that should be properly understood. This section organizes the following concepts that often cause confusion:
- The meaning of devices and partitions
- Mounting and mount points
- The basics of LVM (Logical Volume Management)
- Typical storage configurations in Ubuntu
We will explain each of these step by step.
1.1 Basics of Devices and Partitions
Devices (Physical and Logical Disks)
In Linux, each storage unit is handled as a device file. For example, HDDs, SSDs, and USB drives are represented by names such as /dev/sda, /dev/sdb, or /dev/nvme0n1.
The alphabetical suffix (a, b, c, etc.) indicates the order in which the system detected the devices.
Partitions
A single physical device can be used as-is, but in most cases it is divided into multiple logical areas called partitions. Partitioning allows you to manage the operating system, user data, and logs separately.
For example, /dev/sda1 and /dev/sda2 represent partitions. These names mean “partition 1 / partition 2 on device sda.”
A filesystem is created on each partition, and actual data is stored there.
(Example explanation of Linux partitions: Engineer’s Entrance)
Partitions use formats such as MBR (older) or GPT (newer), each with different limitations and advantages.
1.2 Mounting and Mount Points
Mounting
To make a filesystem usable, a process called mounting is required. This operation associates a partition (or logical volume) with a specific directory (mount point).
Without mounting, data on the partition cannot be accessed.
For example, even if an ext4 filesystem exists on /dev/sda1, you cannot access its contents under /mnt/data unless you execute a command such as mount /dev/sda1 /mnt/data.
Mount Points
The directory where a filesystem is attached is called a mount point.
Typical examples include:
/(slash): Root directory (starting point of the entire system)/home: Location for user home directories/var: Location for logs, caches, and variable data/boot: Location for boot-related files
In Ubuntu and many Linux distributions, the /etc/fstab file defines which devices or UUIDs are mounted at which locations during system startup.
1.3 Overview of LVM (Logical Volume Management)
With traditional partitioning alone, it can be difficult to flexibly modify disk layouts later. To address this, Linux provides LVM (Logical Volume Manager).
Basic Components of LVM
- Physical Volume (PV)
A physical disk or partition. - Volume Group (VG)
A layer that combines multiple PVs into one large virtual storage pool. - Logical Volume (LV)
A logically allocated area created from a VG. Filesystems are created on LVs.
This layered structure allows logical volumes to be expanded or reduced later, and makes it easy to add and integrate additional physical disks.
Advantages and Considerations of LVM
Advantages
- Flexible resizing of storage capacity
- Ability to combine multiple disks
- Easy snapshot creation for backup purposes
Considerations
- Slightly more complex configuration and operation
- Risk of data loss if misconfigured
- Different expansion procedures compared to non-LVM environments
Ubuntu installers often provide an option to use LVM, but it is not mandatory and depends on usage and management policy.
1.4 Typical Storage Configurations in Ubuntu
Single Partition Configuration (Simple Setup)
In the simplest setup, everything is placed under the root directory (/). This approach is easy to manage initially, but later expansion or separation can be difficult.
Common Multi-Partition Configuration
A commonly used layout divides storage into multiple partitions, such as:
/(root): Core system files/home: User data/var: Logs and variable data/boot: Boot files- Swap area (partition or swap file)
This structure helps prevent logs or caches from overwhelming the entire system.
LVM-Based Logical Volume Configuration
A more advanced configuration uses LVM as follows:
- Physical disks → PVs
- Multiple PVs combined into a VG
- Logical volumes created for
/,/home,/var, etc. - Future expansion or addition of new LVs is possible
This approach provides high flexibility when adding disks or expanding storage.
2. Basic Command-Line Methods to Check Disk Space
On Ubuntu, using command-line tools is the most reliable and flexible way to check disk usage.
Commands allow precise analysis even on server environments without a GUI.
This section focuses on the fundamental df and du commands, along with supporting tools.
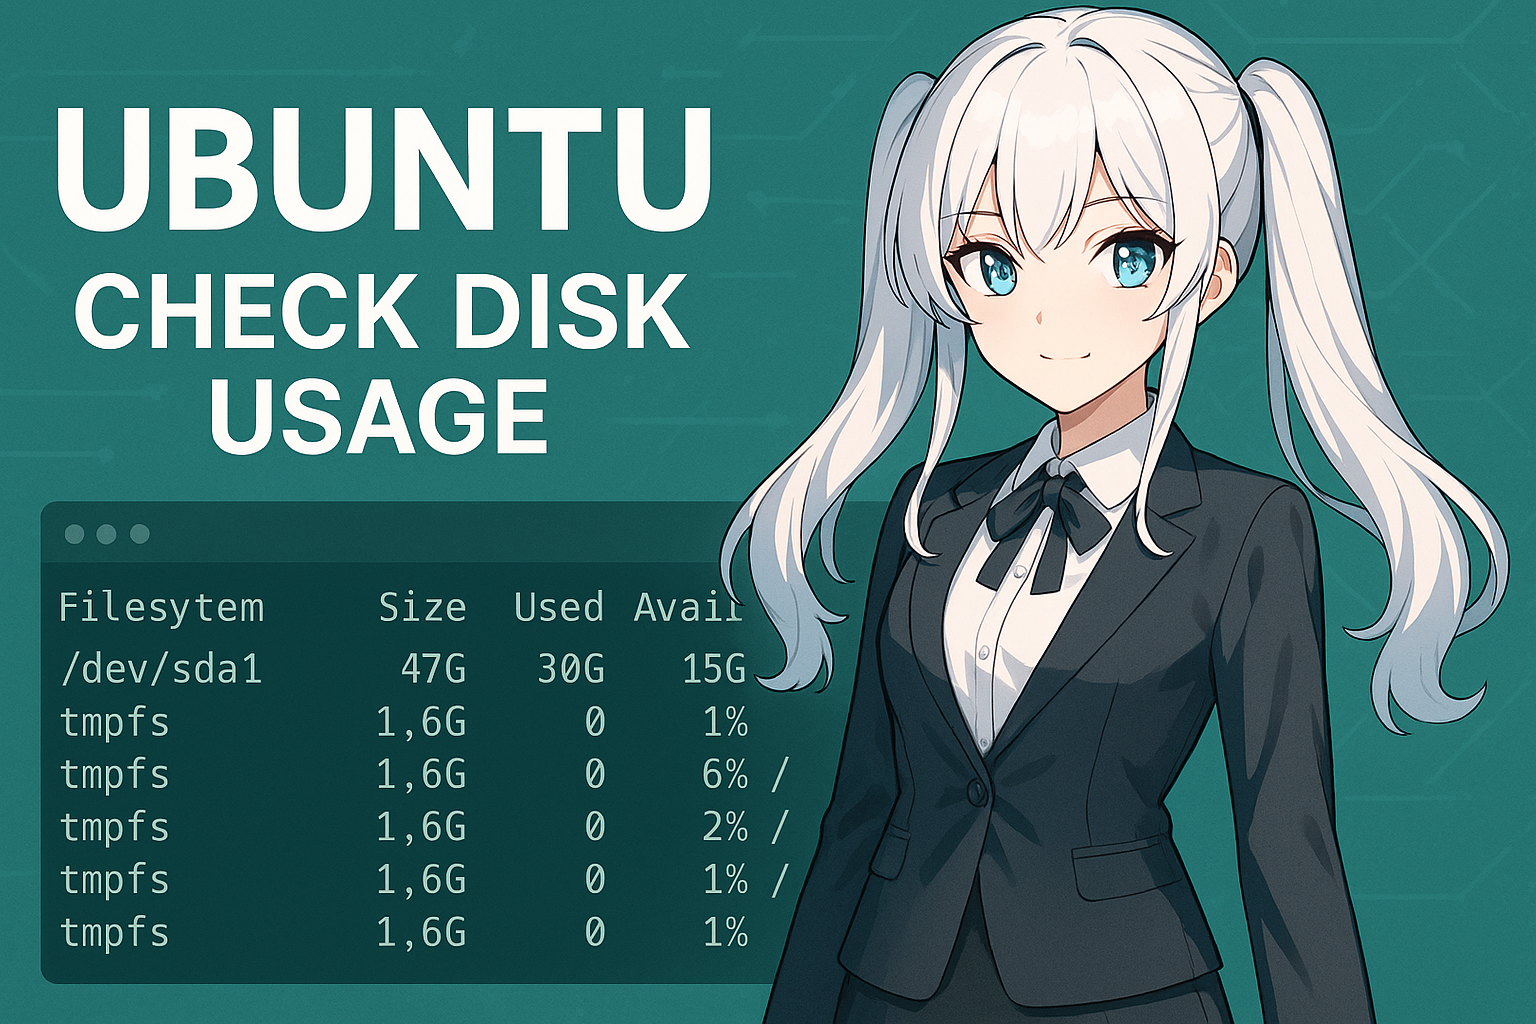
2.1 Checking Filesystem Usage with the df Command
Overview of df
df (disk free) displays overall disk usage and available space for filesystems.
It is the most common way to check disk capacity on Linux systems, including Ubuntu.
Basic Usage
df -hThis command lists all filesystems using human-readable units (K, M, G).
The main columns mean the following:
Main Columns Explained
| Column | Description |
|---|---|
| Filesystem | Target device name (e.g., /dev/sda1) |
| Size | Total filesystem size |
| Used | Used disk space |
| Avail | Remaining available space |
| Use% | Usage percentage |
| Mounted on | Mount point (e.g., /, /home) |
Commonly Used Options
| Option | Description |
|---|---|
-h | Display sizes in MB / GB (essential for readability) |
-T | Also display filesystem type (ext4, xfs, etc.) |
--total | Add a total summary line at the end |
df -h /home | Display only the filesystem containing a specific directory |
Execution Example
$ df -h
Filesystem      Size  Used Avail Use% Mounted on
/dev/sda2       100G   55G   40G  59% /
/dev/sda1       512M  120M  392M  24% /boot
tmpfs            16G   32M   16G   1% /run
This output allows you to quickly understand how disk space is allocated and used.
Important Notes
- Unmounted partitions are not shown by
df. - Snap packages (e.g.,
/var/lib/snapd/snaps) may consume significant disk space and should be checked separately. - Some mount points are only visible when running with root privileges.
2.2 Checking Directory Usage with the du Command
Overview of du
du (disk usage) measures disk space usage by directories and files.
While df provides a high-level overview, du is ideal for identifying where disk space is actually being consumed.
Basic Usage
du -sh /homeThis command displays the total disk usage of the /home directory in a human-readable format.
Commonly Used Options
| Option | Description |
|---|---|
-s | Show only the summary total |
-h | Automatically convert units for readability |
--max-depth=1 | List usage of directories directly under the specified path |
-c | Display a grand total at the end |
--exclude=PATTERN | Exclude specific directories (e.g., caches) |
Example: Comparing Directory Sizes
sudo du -h --max-depth=1 /varExample output:
1.2G    /var/log
2.5G    /var/lib
800M    /var/cache
4.5G    /var
This makes it easy to identify which directories consume the most space.
Advanced Usage: Sorting by Size
By combining du with sort, you can quickly identify large directories.
sudo du -hsx /* | sort -rh | head -10This command calculates disk usage for directories directly under the root directory and displays the top 10 largest ones.
Important Notes
- Execution may take time for deep directory hierarchies.
- Without root privileges, disk usage for some directories may not be displayed correctly.
- Even on fast SSDs, scanning tens of gigabytes may take several minutes.
2.3 Other Useful Supporting Commands and Tools
lsblk: Viewing Block Device Structure
lsblklsblk displays disk devices and their partition layout in a tree format.
It is useful for visually understanding how devices, partitions, and mount points relate to each other.
Example:
NAME   MAJ:MIN RM   SIZE RO TYPE MOUNTPOINTS
sda      8:0    0   100G  0 disk
├─sda1   8:1    0   512M  0 part /boot
└─sda2 8:2 0 99.5G 0 part /ncdu: Interactive Disk Usage Analyzer
If you want a more intuitive alternative to du, ncdu (NCurses Disk Usage) is highly recommended.
Installation:
sudo apt install ncduLaunch:
sudo ncdu /You can navigate directories using the arrow keys and interactively identify disk usage hotspots.
This tool is especially popular among system administrators for server environments.
Combining with the find Command
To locate large individual files, use find:
sudo find / -type f -size +1GThis command searches for all files larger than 1GB, which is useful for identifying large logs or disk images.
2.4 Choosing the Right Method (Comparison Summary)
| Purpose | Command Example | Characteristics |
|---|---|---|
| Check overall free disk space | df -h | Filesystem-level overview |
| Check a specific directory | du -sh /path | Detailed size measurement |
| Find disk usage hotspots | du -hsx /* | sort -rh | Quick identification of large directories |
| View device and partition layout | lsblk | Visual representation of structure |
| Find large files | find / -type f -size +1G | Filter by file size |
3. Checking Disk Space Using GUI Tools (Ubuntu Desktop)
Ubuntu provides convenient graphical tools (GUI) that allow you to check disk space without using the terminal.
This section introduces the following two primary methods:
- Using the default file manager (Nautilus)
- Using the Disk Usage Analyzer (Baobab)
3.1 Checking Available Space with the File Manager (Nautilus)
Standard Method in Ubuntu
On Ubuntu Desktop, the easiest way to check disk space is by opening the file manager (Nautilus).
- Click the “Files” icon in the left dock (application launcher)
- Check the status bar displayed at the top right or bottom left
- The remaining disk space is shown as “XX GB free” or “XX GB used out of YY GB”
This allows you to quickly verify available space on the system drive.
Viewing Details via Properties
Right-click a folder or drive icon and select [Properties] to view detailed usage information for that specific folder or volume.
This is particularly useful for visually checking the size of directories such as /home or /Downloads.
Advantages and Limitations
| Advantages | Limitations |
|---|---|
| Simple, click-based operation | Difficult to analyze system-wide or hidden areas |
| Beginner-friendly | Hard to detect growth in /var/log or system directories |
While useful for a quick overview, deeper analysis is better handled with the Baobab tool described next.
3.2 Disk Usage Analyzer (Baobab)
What Is Baobab?
Baobab (officially called Disk Usage Analyzer) is a graphical tool included with Ubuntu that visually displays disk usage using pie charts and tree maps.
It is often installed by default, but if not, it can be installed with the following command:
sudo apt install baobab
How to Launch Baobab
- Search for “Disk Usage” in Activities (top-left search)
- Click “Disk Usage Analyzer (Baobab)” to launch
- After startup, select “Scan Folder” or “Scan Filesystem”
Once the scan completes, disk usage is displayed visually using a pie chart or tree view.
Example Display (Conceptual)
- Outer rings represent deeper directory levels
- Area size corresponds to disk usage
This makes it easy to instantly identify which folders are consuming the most space.
Main Features
| Feature | Description |
|---|---|
| Target Selection | Scan specific directories such as /home |
| Tree View | View folder hierarchy and sizes in a list format |
| Identifying Unnecessary Files | Quickly spot large directories at a glance |
| Right-click → Open | Open the corresponding directory directly in the file manager |
Advantages and Caveats
Advantages
- Intuitive graphical visualization suitable for beginners
- Easier decision-making for cleanup and file organization
- System directories can be analyzed when launched with root privileges
Caveats
- Scanning the entire filesystem may take time
- Permission restrictions may prevent accurate measurement of some folders
- Large disks may require significant memory during analysis
3.3 Checking Disk Information with GNOME Disks
Ubuntu also includes a standard application called GNOME Disks (Disk Utility).
This tool is used to inspect the disk structure itself, rather than just available space.
You can view the following information:
- Device names (e.g., /dev/sda)
- Filesystem types (ext4, NTFS, etc.)
- Mount points
- Usage and available space graphs
How to launch:
- Search for “Disks” in Activities
- Open GNOME Disks
- Select a disk from the list on the left
Disk usage is displayed using visual gauges, providing information equivalent to the df command in graphical form.
3.4 Choosing Between GUI and Command-Line Tools
On Ubuntu Desktop, GUI tools alone are sufficient for basic disk space management.
However, for precise troubleshooting and server administration, command-line tools such as df and du are essential.
| Scenario | Recommended Tool |
|---|---|
| Quickly check available space | File Manager (Nautilus) |
| Analyze which folders are large | Baobab (Disk Usage Analyzer) |
| Inspect disk and partition layout | GNOME Disks |
| Server or remote environments | df, du, lsblk, ncdu |
3.5 Environments Without GUI (For Server Users)
If you are running Ubuntu Server or another environment without a GUI,
tools like Baobab or the file manager are unavailable.
In such cases, the previously introduced commands df, du, and ncdu provide sufficiently detailed disk analysis using only the terminal.
Summary
Using GUI tools allows disk usage checks and cleanup analysis to be completed entirely through clicks.
Baobab, in particular, is a widely used standard tool suitable for both beginners and advanced users.
By combining the methods introduced in this section, routine storage monitoring becomes significantly easier.
4. Investigation and Countermeasures When Disk Space Is Low
When using Ubuntu over long periods, disk space may gradually become constrained due to accumulated updates and data.
Leaving a system in a low-space state can cause update failures, logging issues, and overall instability.
This section explains step-by-step procedures to identify disk space issues and apply effective solutions.
4.1 Identifying Signs of Disk Space Exhaustion
First, check for symptoms indicating insufficient disk space.
If you encounter any of the following, it is time to investigate storage usage:
apt upgradereports “insufficient disk space”- GUI warnings such as “Low disk space” appear
- Some applications fail to save settings or write logs
- Directories such as
/varor/tmpbecome full, causing sluggish behavior
In these situations, simply freeing space is not enough—you must identify where disk space is being consumed.
4.2 Step 1: Check Overall Disk Usage (df)
Start by checking the overall disk situation using the df -h command.
df -hExample output:
Filesystem      Size  Used Avail Use% Mounted on
/dev/sda2        50G   48G  1.2G  98% /
/dev/sda1       512M  120M  392M  24% /boot
Any filesystem with a Use% value above 90% requires immediate attention.
If critical directories such as / (root), /var, or /home are nearly full, proceed to the next step.
4.3 Step 2: Identify Which Directories Are Consuming Space (du)
Once the affected partition is identified, analyze its contents using the du command.
Example: Display Top 10 Largest Directories
sudo du -hsx /* | sort -rh | head -10Example output:
15G /var
10G /home
5.2G /usr
3.1G /snap
If /var is large, logs or caches are usually responsible. If /home is large, user data is typically the cause.
Drilling Down Further Inside /var
sudo du -hsx /var/* | sort -rh | head -10By traversing the directory hierarchy in this way, you can pinpoint the exact directories consuming disk space.
4.4 Step 3: Removing Unnecessary Files and Caches
Once the sources of disk usage are identified, begin cleaning up from safe-to-delete unnecessary files.
(1) Removing APT Cache
Ubuntu stores temporary package files in /var/cache/apt/archives during updates.
Deleting them can often recover several gigabytes of disk space.
sudo apt clean
sudo apt autoremove
apt clean: Removes all cached package filesapt autoremove: Removes unused dependency packages
(2) Deleting Old Log Files
/var/log is one of the most common causes of disk space bloat.
sudo journalctl --vacuum-time=7dThis removes system logs older than seven days.
You can also manually delete unnecessary compressed log files (.gz).
sudo rm -f /var/log/*.gz(3) Removing Old Snap Package Revisions
On Ubuntu, Snap applications keep multiple versions by default.
Old disabled revisions can be removed using the following command:
sudo snap list --all | grep disabled | awk '{print $1, $3}' | \
while read snapname revision; do
  sudo snap remove "$snapname" --revision="$revision"
done
Alternatively, you can use dedicated “Snap Cleaner” utilities.
(4) Removing Thumbnail Cache
If you frequently handle images or videos, large amounts of cache may accumulate in ~/.cache/thumbnails.
rm -rf ~/.cache/thumbnails/*(5) Emptying the Trash
Files deleted via the GUI are often still stored in ~/.local/share/Trash/files.
rm -rf ~/.local/share/Trash/*4.5 Step 4: Addressing Application and Log-Related Disk Growth
(1) Docker Environments
If Docker is in use, unused images and containers often consume significant disk space.
docker system df
docker system prune -a
docker system df: Check Docker-related disk usagedocker system prune -a: Remove unused images and containers
(2) Heavy Use of Flatpak or Snap
Desktop environments with many GUI applications tend to accumulate leftover data from old versions.
Use commands such as flatpak uninstall --unused to clean up.
(3) Reviewing Log Rotation Settings
Check /etc/logrotate.conf and files under /etc/logrotate.d/ to ensure log retention periods and size limits are properly configured.
This helps prevent future disk space issues.
4.6 Step 5: Solving the Root Cause with Resizing or Disk Expansion
If cleanup alone is insufficient, consider the following structural changes.
(1) Expanding Logical Volumes with LVM
In environments using LVM (Logical Volume Manager), logical volumes can be expanded easily.
sudo lvextend -L +20G /dev/ubuntu-vg/ubuntu-lv
sudo resize2fs /dev/ubuntu-vg/ubuntu-lv
This increases the available space of the root filesystem.
(2) Adding and Mounting a New Disk
You can mount a new storage device under directories such as /mnt/data,
and relocate large directories (e.g., /var/lib/docker or /home) to the new disk.
(3) Using Cloud Storage
Another option is moving logs or backups to cloud storage services such as Google Drive, Dropbox, or Nextcloud.
4.7 Preventing Recurrence with Regular Monitoring
Disk space shortages are preventable with regular monitoring.
The following operational practices are effective:
- Regularly check
df -handdu -sh /var - Create scripts to automatically detect large directories
- Send email alerts when disk usage exceeds a defined threshold (using
cronandmailutils)
Simple example:
#!/bin/bash
THRESHOLD=90
USAGE=$(df / | awk 'NR==2 {print $5}' | sed 's/%//')
if [ "$USAGE" -gt "$THRESHOLD" ]; then
  echo "Disk usage on / has exceeded ${THRESHOLD}%!" | mail -s "Disk Alert" admin@example.com
fi
4.8 Summary: Priority Order for Disk Space Countermeasures
| Priority | Countermeasure | Notes |
|---|---|---|
| ★★★★★ | Remove APT cache (sudo apt clean) | Immediate effect |
| ★★★★☆ | Log cleanup (sudo journalctl --vacuum-time=7d) | Safe and reliable |
| ★★★★☆ | Remove unused Snap / Flatpak versions | Effective on desktop systems |
| ★★★☆☆ | Remove unused Docker data | Effective for server use |
| ★★☆☆☆ | Disk expansion or additional mounts | Effective as a fundamental solution |
| ★☆☆☆☆ | Introduce monitoring scripts | Most effective for long-term operations |
When disk space becomes constrained on Ubuntu,
“identify heavy usage → safely remove unnecessary data → review the system structure”
Following this three-step approach resolves most issues.
5. Advanced Tips (Useful Techniques and Precautions)
Even after mastering basic disk space checks and cleanup methods, disk usage can gradually increase again during long-term operation.
This section introduces advanced techniques to help keep Ubuntu systems running smoothly.
5.1 Automating Regular Disk Checks
Manually running df and du can be tedious, but automation scripts greatly reduce effort.
By registering a simple monitoring script with cron, you can receive alerts when disk usage exceeds a certain level.
Example: Email Notification When Free Space Drops Below 10%
#!/bin/bash
THRESHOLD=90
USAGE=$(df / | awk 'NR==2 {print $5}' | sed 's/%//')

if [ "$USAGE" -gt "$THRESHOLD" ]; then
  echo "Warning: Root disk usage has reached ${USAGE}%." | \
  mail -s "Ubuntu Disk Warning" user@example.com
fi
Save this as /usr/local/bin/check_disk.sh and grant execute permission with chmod +x.
Then register it using crontab -e:
0 8 * * * /usr/local/bin/check_disk.sh→ This runs the check automatically every morning at 8:00.
Helpful Enhancements
- Notifications can be sent not only by email but also via Slack webhooks or LINE Notify
- The script can be extended to monitor multiple mount points simultaneously
5.2 One-Liners to Find Large Files
Disk space shortages are often caused by a single large file.
The following one-liner lists all files larger than 1GB:
sudo find / -type f -size +1G -exec ls -lh {} \; | awk '{print $9 ": " $5}'Example output:
/var/log/syslog.1: 1.5G
/var/lib/docker/overlay2/.../diff/usr/lib/libchrome.so: 2.3G
/home/user/Downloads/video.mp4: 4.1G
This allows you to quickly identify files that should be deleted or moved.
Variation: Search Only a Specific Directory
sudo find /var -type f -size +500MThis is useful when investigating large files under /var.
5.3 Creating Aliases for Frequently Used Commands
Typing long commands repeatedly is inefficient, so setting up aliases improves productivity.
Example: Add to ~/.bashrc
alias dfh='df -h --total'
alias duh='sudo du -hsx /* | sort -rh | head -10'
alias logs='sudo du -hs /var/log/* | sort -rh | head -10'
Apply the changes:
source ~/.bashrcAfter this, you can quickly run:
dfh: Check total disk usageduh: Show top 10 largest directorieslogs: Analyze log directory usage
5.4 Continuously Monitoring Disk Usage Changes
During long-term Ubuntu operation, disk usage can grow unnoticed.
Keeping a history of disk usage is an effective countermeasure.
Example: Log Disk Usage to a File
#!/bin/bash
df -h / | awk 'NR==2 {print strftime("%Y-%m-%d %H:%M:%S"), $3, $4, $5}' >> /var/log/disk_usage.log
Running this daily via cron allows you to track growth trends over time.
More Advanced Approaches
- Visualize usage with
collectdornetdata - Use Prometheus + Grafana for enterprise monitoring
- Integrate with AWS CloudWatch or GCP Ops Agent in cloud environments
5.5 Be Aware of Permission Barriers
Accurate disk analysis may require root privileges.
Example:
du -sh /varWithout sufficient permissions, some directories may be skipped with “Permission denied,”
resulting in smaller reported sizes than actual usage.
→ Use sudo or administrative privileges when performing system-wide analysis.
5.6 Considerations for SSD and HDD Environments
SSD Environments
- Enable regular TRIM operations to avoid unnecessary writes:
sudo systemctl enable fstrim.timer
This allows SSDs to optimize deleted blocks automatically.
HDD Environments
- Log and cache fragmentation may occur more easily, so rebooting after cleanup can be effective
- Run I/O-intensive commands such as
duduring low-load periods (e.g., late at night)
5.7 Turning Disk Management into a Preventive System
The optimal approach to disk management is habitual and systematic prevention.
Practical Checklist
- Regularly check
df -h - Review
/var/loggrowth monthly - Run
apt autoremoveweekly - Clean up unused Snap and Docker data regularly
- Enable automated alert scripts
By following these practices, most disk space issues can be prevented in advance.
Summary
This section introduced advanced techniques for efficient disk management on Ubuntu.
The key points are:
- Early detection through automation and alerts
- Improved efficiency using aliases and one-liners
- Safe management with awareness of permissions and storage characteristics
Combining these approaches elevates disk management from a tedious task to a core part of system operations.
6. FAQ (Frequently Asked Questions)
Q1. What is the easiest way to check current disk space on Ubuntu?
The simplest method is to run the following command in a terminal:
df -hThis displays the total size, used space, and available space for each filesystem.
The -h option formats values in a human-readable way (GB / MB).
Q2. How can I check disk usage by directory?
Use the du command.
To check a specific directory:
du -sh /homeOption meanings:
-s: Show only the total-h: Display sizes in a human-readable format
For more detailed analysis:
sudo du -h --max-depth=1 /varQ3. What is the difference between df and du?
In short, they measure different targets.
| Command | Target | Main Purpose |
|---|---|---|
df | Entire filesystem | Check available space |
du | Files and directories | Identify disk usage sources |
Q4. How can I check disk space using GUI tools?
On Ubuntu Desktop, you can use the File Manager (Nautilus) or Disk Usage Analyzer (Baobab).
- File Manager: Shows remaining space in the status bar
- Baobab: Visualizes disk usage with charts and tree maps
Q5. What should I delete first when I see a “disk is full” warning?
Start with safe items in the following order:
- APT cache:
sudo apt clean - Unused packages:
sudo apt autoremove - Old logs:
sudo journalctl --vacuum-time=7d - Trash and thumbnail cache:
rm -rf ~/.cache/thumbnails/* ~/.local/share/Trash/*
Q6. Do Snap applications consume a lot of disk space?
Yes. Snap keeps multiple revisions by design.
Remove unused revisions with:
sudo snap list --all | grep disabled | awk '{print $1, $3}' | \
while read snapname revision; do
  sudo snap remove "$snapname" --revision="$revision"
done
Q7. What if /var or /home is too large?
/var: Clean logs (/var/log) and caches (/var/cache)/home: Archive or move large user files to external storage
If necessary, consider expanding storage using LVM or mounting an additional disk.
Q8. The du command takes too long. How can I speed it up?
- Limit depth with
--max-depth=1 - Exclude unnecessary directories (e.g.,
--exclude=/proc) - Use
ncdufor interactive analysis
Q9. How can I prevent disk space issues from recurring?
- Run
sudo apt autoremoveweekly - Check
/var/logand/homemonthly - Log
df -houtput to track trends - Regularly clean Snap and Docker data
- Enable TRIM on SSD systems
Q10. What options are available for expanding disk space?
- Expand LVM volumes
sudo lvextend -L +10G /dev/ubuntu-vg/ubuntu-lvsudo resize2fs /dev/ubuntu-vg/ubuntu-lv - Add and mount a new disk under directories such as
/mnt/data - Use cloud storage for large files and backups
Q11. Can I check disk usage without root privileges?
You can run df -h, but du requires permissions to inspect some directories.
Without root access, limit analysis to your home directory:
du -sh ~/*Q12. How can I check disk space on a server without GUI?
Use the following command set:
| Purpose | Command |
|---|---|
| Check overall usage | df -h |
| Directory-level analysis | sudo du -hsx /* |
| Find large files | sudo find / -type f -size +1G |
| Interactive analysis | sudo ncdu / |
Q13. Is there any risk in checking disk usage?
Simply checking disk usage is safe.
However, deletion or resizing operations require caution.
- Double-check paths when using
sudo rm -rf - Never delete system directories such as
/bin,/lib, or/etc - Create backups if unsure
Q14. Are there any tricks to save disk space?
- Shorten log retention in
/etc/logrotate.conf - Remove unused language packs (
sudo apt install localepurge) - Remove old kernels automatically (
sudo apt autoremove --purge)
Q15. What are recommended disk monitoring tools?
| Tool | Features |
|---|---|
| ncdu | Lightweight and fast CLI tool |
| Baobab | GUI-based visual analysis |
| duf | Enhanced df with readable tables |
| Netdata / Prometheus / Grafana | Advanced server monitoring and visualization |
Final Summary
Through this FAQ, the key points of disk management on Ubuntu can be summarized as follows:
- Use both
df(overview) anddu(details) - Remove unnecessary data in a safe order (APT → logs → cache)
- Prevent recurrence through automation and monitoring
By making these practices routine, disk space issues become rare.
Disk management may be unglamorous, but it is one of the most critical maintenance tasks for stable Ubuntu operation.