- 1 1. Prerequisite Knowledge: Storage Structure and Mounting in Linux/Ubuntu
- 2 2. Basic Commands to Check Capacity
- 3 3. Checking disk usage with a GUI (Ubuntu Desktop)
- 4 4. Investigation Steps and Remedies for Low Disk Space
- 4.1 4.1 Recognizing Low‑Space Symptoms
- 4.2 4.2 Step 1: Get an Overview of Usage (df)
- 4.3 4.3 Step 2: Find Which Directories Consume Space (du)
- 4.4 4.4 Step 3: Remove Unnecessary Files and Caches
- 4.5 4.5 Step 4: Mitigating Bloat from Applications and Logs
- 4.6 4.6 Step 5: Fundamentally Resolve by Resizing or Adding Disks
- 4.7 4.7 Regular Checks to Prevent Recurrence
- 4.8 4.8 Summary: Prioritizing Space‑Saving Measures
- 5 5. Advanced Tips (Useful Tricks & Caveats)
- 5.1 5.1 Automate Regular Disk Checks
- 5.2 5.2 One‑liner to Find Large Files
- 5.3 5.3 Alias frequently used commands
- 5.4 5.4 Continuously monitor disk usage changes (monitoring)
- 5.5 5.5 Beware of permission barriers
- 5.6 5.6 Considerations for SSD/HDD environments
- 5.7 5.7 Systematize capacity management to prevent recurrence
- 5.8 Summary
- 6 6. FAQ (Frequently Asked Questions)
- 6.1 Q1. What is a simple way to check current free space on Ubuntu?
- 6.2 Q2. How can I check disk usage per directory?
- 6.3 Q3. What’s the difference between df and du?
- 6.4 Q4. How can I check free space via the GUI?
- 6.5 Q5. If I get a “disk full” warning, what should I delete first?
- 6.6 Q6. I heard Snap apps can bloat disk space. What can I do?
- 6.7 Q7. What should I do when /var or /home is too large?
- 6.8 Q8. Running du takes a long time. Is there a way to speed it up?
- 6.9 Q9. How can I prevent running out of space again?
- 6.10 Q10. What are my options for expanding storage?
- 6.11 Q11. Can I check disk usage without root privileges?
- 6.12 Q12. How do I check storage on a headless (server) system?
- 6.13 Q13. Is there any risk of breaking the system while checking storage?
- 6.14 Q14. Any hidden tricks to save space?
- 6.15 Q15. Recommended tools for monitoring disk usage?
- 6.16 Summary
1. Prerequisite Knowledge: Storage Structure and Mounting in Linux/Ubuntu
When checking storage capacity on Ubuntu (and most Linux‑based OSes), there are some fundamental structures you need to understand correctly. This section organizes the concepts that often cause confusion:
- Device and partition meanings
- Mounting and mount points
- Basics of LVM (Logical Volume Management)
- Typical Ubuntu configurations
We’ll walk through each point step by step.
1.1 Devices and Partitions Basics
Devices (Physical & Logical Disks)
In Linux, each storage device is treated as a device file. For example, HDDs, SSDs, USB drives, etc., appear as /dev/sda, /dev/sdb, /dev/nvme0n1, and so on.
The trailing letter (a, b, c…) indicates the order in which the system detected the devices.
Partitions
A single physical device can be used as‑is, but it’s common to split it into several logical sections (partitions). Partitioning lets you separate the OS, data, logs, etc., for easier management.
For example, /dev/sda1, /dev/sda2 denote the first and second partitions on device sda. A filesystem is created on each partition, and the actual data is stored there.
(Example explanation of partitions in Linux) Engineer’s Entrance
Partitions use a partition‑table format such as MBR (old) or GPT (new), each with its own constraints and advantages.
1.2 Mounting and Mount Points
Mount
To make a filesystem usable, you must mount it—i.e., associate a partition (or logical volume) with a specific directory (the mount point). Without mounting, you cannot access the data on that partition.
For instance, even if /dev/sda1 contains an ext4 filesystem, you must run mount /dev/sda1 /mnt/data before you can work under /mnt/data.
Mount Point
The directory where you mount a filesystem is called a mount point. Typical examples:
/– root, the starting point of the whole system/home– user home directories/var– logs, caches, variable data/boot– boot‑related files
Assigning different partitions to different mount points is a common practice.
In Ubuntu and most Linux OSes, the file /etc/fstab lists “which device/UUID is mounted where (automatically at boot).”
1.3 Overview of LVM (Logical Volume Management)
Pure partitioning can make later changes difficult. LVM (Logical Volume Manager) solves this.
Core LVM Components
- Physical Volume (PV) – a physical disk or partition.
- Volume Group (VG) – aggregates multiple PVs into a single large pool.
- Logical Volume (LV) – a slice taken from a VG; a filesystem is created on an LV.
This hierarchy lets you expand or shrink logical volumes later, or add more physical disks to the pool.
Benefits & Caveats of LVM
Benefits
- Flexible resizing
- Combine multiple disks into one pool
- Easy to create snapshots for backup
Caveats
- More complex to configure and operate
- Risk of data loss if mishandled
- Expansion steps differ from non‑LVM setups
Ubuntu’s installer often offers an LVM option, but many users choose not to use it depending on their needs.
1.4 Typical Ubuntu Configurations
The exact layout varies, but common patterns include:
Single‑Partition (Simple) Layout
All files live under the root (/). Simpler, but later splitting or expanding can be hard.
Split Layout Example
/– system files/home– user data/var– logs and variable data/boot– boot loader files- Swap (swap partition or swap file)
Separating these helps prevent log or cache growth from filling the whole system.
LVM + Logical Volumes
A more advanced setup:
- Physical disks → PVs
- Multiple PVs → VG
/,/home,/var, etc. → separate LVs- Add or expand LVs later as needed
With LVM you can add disks or enlarge logical volumes flexibly.
2. Basic Commands to Check Capacity
On Ubuntu, using the command line is the most reliable and flexible way to check disk usage. Even on headless servers, you can see exactly which disks are used and which directories consume space.
Below are the core df and du commands, plus a few helper tools.
2.1 Checking Whole Filesystems with df
What df Does
df (disk free) displays total, used, and available space for each filesystem. It’s the most common way to check capacity on Linux.
Basic Usage
df -h
The command lists every filesystem in “human‑readable” units (K, M, G). Main columns:
| Column | Meaning |
|---|---|
| Filesystem | Device name (e.g., /dev/sda1) |
| Size | Total size of the filesystem |
| Used | Space already used |
| Avail | Free space remaining |
| Use% | Percentage used |
| Mounted on | Mount point (e.g., /, |
| Option | Description |
|---|---|
-h | Display sizes in MB/GB units (handy for a quick view) |
-T | Also show the filesystem type (e.g., ext4, xfs) |
--total | Append a total line at the end |
df -h /home | Show only the filesystem that contains the specified directory |
Example
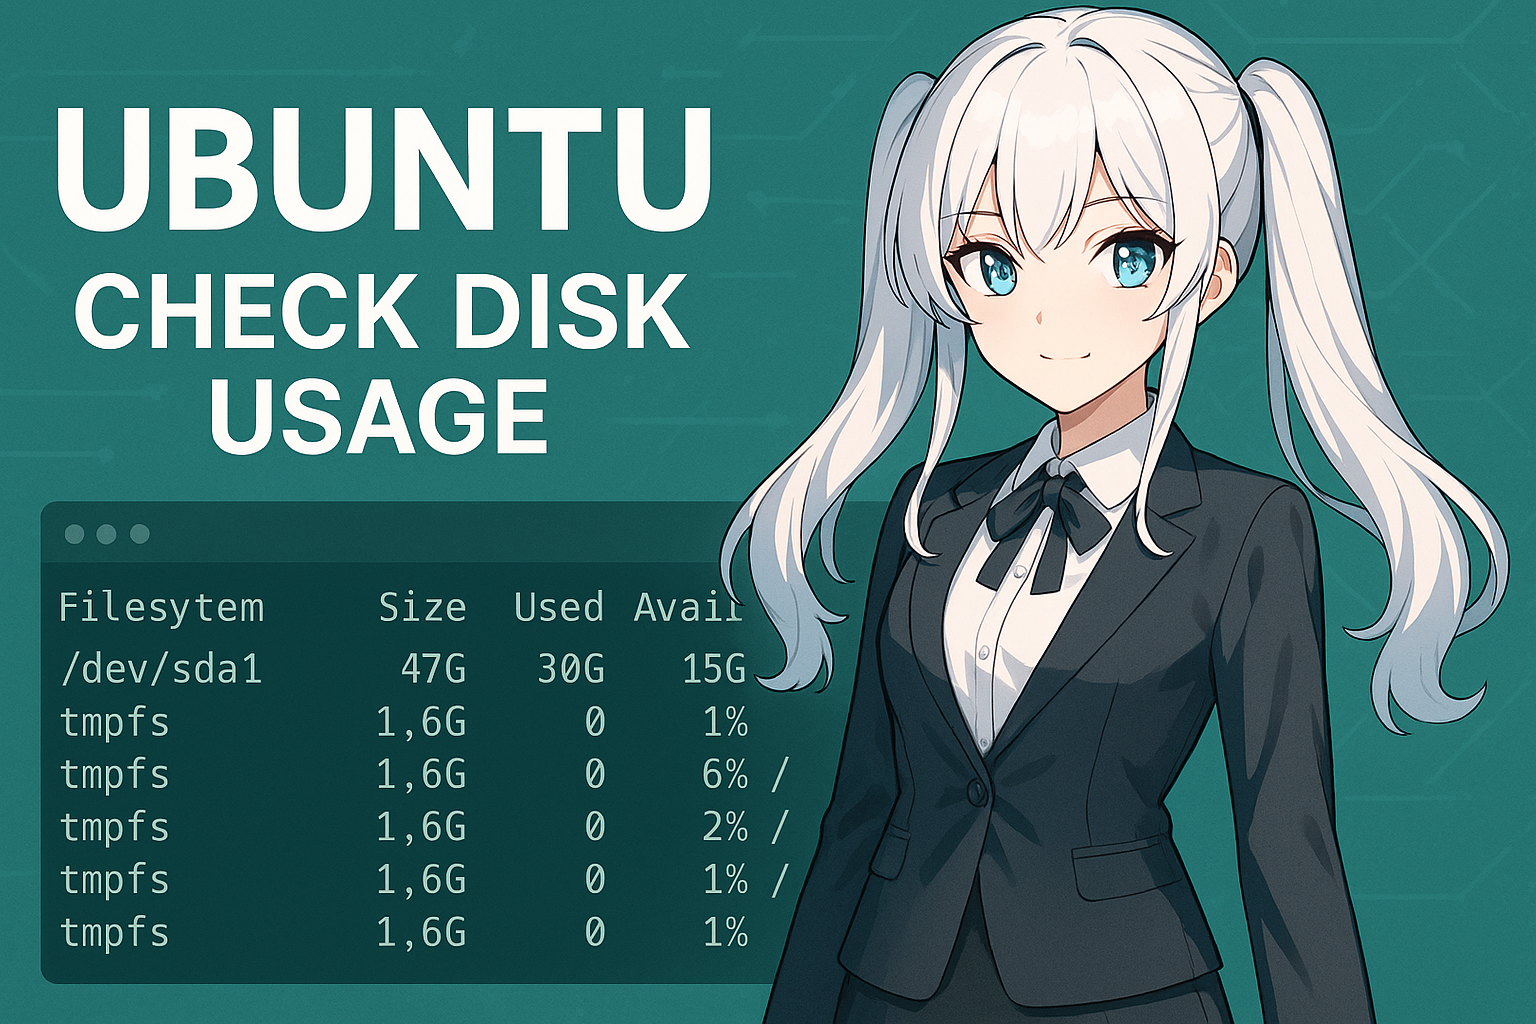
$ df -h
Filesystem      Size  Used Avail Use% Mounted on
/dev/sda2       100G   55G   40G  59% /
/dev/sda1       512M  120M  392M  24% /boot
tmpfs            16G   32M   16G   1% /run
From this output you can see at a glance how much space each area is using.
Notes
- Unmounted partitions are not included in
df‘s output. - If Snap packages (
/var/lib/snapd/snaps) are consuming space, you’ll need to check them separately. - Some mount points are invisible without root privileges.
2.2 Checking directory‑level usage with the du command
Overview of du
du (disk usage) is a command that reports the size of directories and files.
While df gives you the “big picture,” du helps you find out “where the heavy stuff is.”
Basic usage
du -sh /home
In this example, the total usage of the /home directory is shown in a “human‑readable format” (-h).
Common options
| Option | Description |
|---|---|
-s | Show only the total (suppress details) |
-h | Auto‑scale units for readability |
--max-depth=1 | List usage of items directly under the specified directory |
-c | Show a grand total at the end |
--exclude=PATTERN | Exclude specific folders (e.g., caches) |
Example (overall comparison)
sudo du -h --max-depth=1 /var
Sample output:
1.2G    /var/log
2.5G    /var/lib
800M    /var/cache
4.5G    /var
This lets you quickly see which folders are taking up space.
Advanced: Sort by size
By combining du with sort, you can easily pinpoint large directories.
sudo du -hsx /* | sort -rh | head -10
This command calculates the usage of each top‑level folder and displays the top 10.
It’s very effective for hunting down the “space‑eating culprits” across the system.
Notes
- Deep directory trees can take a while to process.
- Without root privileges, some directories won’t report accurate sizes.
- Even on fast SSDs, measuring tens of gigabytes can take several minutes.
2.3 Other handy helper commands & tools
lsblk: View block device layout
lsblk
lsblk displays disk devices and their partition layout in a tree format.
It’s a convenient way to visually correlate sizes with mount points.
Example:
NAME   MAJ:MIN RM   SIZE RO TYPE MOUNTPOINTS
sda      8:0    0   100G  0 disk
├─sda1   8:1    0   512M  0 part /boot
└─sda2   8:2    0  99.5G  0 part /
ncdu: Interactive disk‑usage analyzer
If you want a more intuitive interface than du, try ncdu (NCurses Disk Usage).
Install it with:
sudo apt install ncdu
Run it:
sudo ncdu /
Use the arrow keys to expand and collapse folders and see which directories are consuming space.
Because it works without a GUI, it’s popular on servers as well as workstations.
Combining with find
To locate only the largest files, use find:
sudo find / -type f -size +1G
This searches for all files larger than 1 GB, helping you identify unnecessary large files such as logs or virtual machine images.
2.4 Which method to use? (Comparison summary)
| Goal | Example command | Characteristics |
|---|---|---|
| Check overall free space | df -h | Shows usage per filesystem |
| Find size of a specific folder | du -sh /path | Displays detailed size |
| Locate space‑eaters | du -hsx /* \| sort -rh | Sorts directories by size |
| View device layout | lsblk | Visualizes partition relationships |
| Find large files | find / -type f -size +1G | Filters by size condition |
3. Checking disk usage with a GUI (Ubuntu Desktop)
Ubuntu provides graphical tools that let you see disk usage without opening a terminal. Below are two common methods.
- The built‑in File Manager (Nautilus)
- The Disk Usage Analyzer (Baobab)
We’ll look at the features and how to use each.
3.1 Checking free space with the File Manager (Nautilus)
The default Ubuntu method
If you’re using Ubuntu Desktop, the simplest way to see disk space is to open the File Manager (Nautilus).
- Click the Files icon in the left dock (application launcher).
- Look at the status bar at the top‑right or bottom‑left of the window.
- You’ll see something like “xx GB of yy GB used” or “zz GB free.”
This gives you an immediate view of the system drive’s free space.
Viewing details via Properties
Right‑click a folder or drive icon and choose Properties.
The dialog shows the used and free space for that specific folder, which is handy for checking directories such as /home or /Downloads.
Pros and cons
| Pros | Cons |
|---|---|
| One‑click, very easy | Hidden or system areas are not obvious |
| Beginner‑friendly | Doesn’t reveal /var/log, system partitions, etc. |
The GUI is great for a quick “feel” of overall usage, but for deeper analysis you’ll want Baobab.
3.2 Disk Usage Analyzer (Baobab)
What is Baobab?
Baobab (Disk Usage Analyzer) is a graphical utility that scans your file system and presents the results as an interactive treemap or ring chart. It lets you quickly spot large directories and files with a visual overview.
Installation
sudo apt install baobab
Launching
You can start it from the application menu (search for “Disk Usage Analyzer”) or run:
baobab
How to use
- Choose a location to scan (e.g., “Home Folder,” “Filesystem,” or a custom path).
- After the scan finishes, the treemap displays each folder as a rectangle sized proportionally to its space consumption.
- Hover or click a rectangle to see the exact size and path.
- Right‑click a folder to open it in the file manager or delete it directly.
Because Baobab works without needing a full desktop environment, it’s also useful on lightweight Ubuntu flavors.
Benefits
- Visual, intuitive representation of disk usage.
- Easy navigation to the biggest space consumers.
- No need to remember command‑line options.
Limitations
- Scanning very large filesystems can take a few minutes.
- Requires a graphical session (not suitable for headless servers).
Baobab (official name: Disk Usage Analyzer) is a graphical tool available by default on Ubuntu that visually shows how much space each folder is using with pie charts and treemaps.
It is installed on most systems by default, but if it isn’t present you can add it with:
sudo apt install baobab

How to Launch
- Search “Disk Usage” in Activities (top‑left search bar)
- Click Disk Usage Analyzer (Baobab) to start it
- After launch, choose Scan Folder or Scan Whole Filesystem
After a short scan, a pie chart or tree view will display each directory’s usage visually.
Example View (Image)
- The farther out you go, the deeper the directory hierarchy
- Each segment’s size is represented by the area of the pie slice
The visual cue makes it easy to see which folders are bloated at a glance.
Main Features
| Feature | Description |
|---|---|
| Specify Scan Target | You can limit the scan to a specific directory such as /home |
| Tree View | Browse the folder structure and sizes in a list |
| Identify Unneeded Files | Spot large folders instantly |
| Right‑click → Open | Open the selected directory directly in the file manager |
Benefits and Caveats
Benefits
- Graphical display makes it intuitive for beginners
- Helps decide what to delete or reorganize
- Running as root lets you analyze system partitions as well
Caveats
- Scanning the entire system can take time
- Permission restrictions may prevent accurate measurement of some folders
- Large disks can increase memory usage while scanning
3.3 Checking Disk Information with GNOME Disks
Ubuntu also includes the standard app GNOME Disks (Disk Utility).
It lets you inspect the disk structure itself, showing more than just free space:
- Device name (e.g.,
/dev/sda) - Filesystem type (ext4, NTFS, etc.)
- Mount point
- Usage graph
How to launch:
- Search for “Disks” in Activities
- Open GNOME Disks
- Select a disk from the list on the left
A visual gauge shows usage, providing the same information as df in a graphical form.
3.4 When to Use GUI vs. Command Line
On an Ubuntu desktop, GUI tools are often enough for storage management.
However, for precise troubleshooting or server administration, command‑line tools like df and du are essential.
| Situation | Recommended Tool |
|---|---|
| Quick check of free space | File manager (Nautilus) |
| Find large folders | Baobab (Disk Usage Analyzer) |
| Inspect device layout | GNOME Disks |
| Server or remote environment | df, du, lsblk, ncdu |
3.5 If No GUI Is Available (Server Users)
If you’re running Ubuntu Server or another environment without a GUI, Baobab and file managers aren’t usable.
In that case, rely on the df, du, and ncdu commands introduced earlier; they provide detailed, text‑based storage analysis.
Summary
Using a GUI lets you check storage and pinpoint cleanup points with just a few clicks.
Baobab, in particular, is a staple tool used by everyone from Ubuntu newcomers to power users.
By mixing the methods described in this chapter, everyday storage monitoring becomes much easier.
4. Investigation Steps and Remedies for Low Disk Space
Over time, long‑term use and cumulative package updates can cause disk space to run low on Ubuntu.
Leaving a system in a low‑space state can lead to failed updates, missing logs, and overall instability.
This section walks through how to diagnose low‑space issues and effective ways to resolve them step by step.
4.1 Recognizing Low‑Space Symptoms
First, identify signs that storage is running out. Look for:
apt upgradereporting “not enough free space”- GUI warning “disk space is low”
- Applications failing to save settings or write logs
/varor/tmpfilling up, causing sluggish behavior
When you see these, it’s time to determine where the space is being used, not just to add more.
4.2 Step 1: Get an Overview of Usage (df)
Start with df -h to see overall capacity:
df -h
Sample output:
Filesystem      Size  Used Avail Use% Mounted on
/dev/sda2        50G   48G  1.2G  98% /
/dev/sda1       512M  120M  392M  24% /boot
Any mount point with Use% ≥ 90% needs attention, especially /, /var, or /home.
4.3 Step 2: Find Which Directories Consume Space (du)
Once you know the problematic partition, drill down with du.
Example: Show Top 10 Space‑Consuming Items
sudo du -hsx /* | sort -rh | head -10
Sample output:
15G /var
10G /home
5.2G /usr
3.1G /snap
A large /var usually points to logs or caches; a large /home indicates user data.
Dig Deeper Inside /var
sudo du -hsx /var/* | sort -rh | head -10
By traversing the hierarchy, you can pinpoint the exact directories that are hogging space.
4.4 Step 3: Remove Unnecessary Files and Caches
After identifying the culprits, start cleaning up safe-to‑delete items.
(1) Clean APT Cache
Ubuntu stores temporary package files in /var/cache/apt/archives. Deleting them can free several gigabytes.
sudo apt clean
sudo apt autoremove
apt clean– removes all cached package filesapt autoremove– removes packages that are no longer needed
(2) Delete Old Log Files
/var/log is a common source of bloat.
sudo journalctl --vacuum-time=7d
The above deletes system logs older than 7 days.
You can also manually delete unnecessary .gz (compressed log) files.
sudo rm -f /var/log/*.gz
(3) Remove old Snap package versions
On Ubuntu, old versions of Snap apps are kept automatically.
You can delete old snaps with the following command.
sudo snap list --all | grep disabled | awk '{print $1, $3}' |
while read snapname revision; do
  sudo snap remove "$snapname" --revision="$revision"
done
Alternatively, you can use a simple “Snap Cleaner” type utility.
(4) Delete thumbnail cache
If you work with many images or videos, a large amount of cache accumulates in ~/.cache/thumbnails.
rm -rf ~/.cache/thumbnails/*
(5) Empty the trash
Files deleted via the GUI may still reside in ~/.local/share/Trash/files.
rm -rf ~/.local/share/Trash/*
4.5 Step 4: Mitigating Bloat from Applications and Logs
(1) When using Docker
When using Docker, unnecessary images and containers can consume space.
docker system df
docker system prune -a
docker system df: Check Docker‑related usagedocker system prune -a: Remove unused images and containers
(2) When heavily using Flatpak or Snap
In environments with many GUI apps installed, leftover app artifacts (old versions) tend to accumulate.
Clean up with commands like flatpak uninstall --unused.
(3) Review log rotation settings
Check /etc/logrotate.conf and /etc/logrotate.d/, and set appropriate retention periods and size limits to help prevent recurrence.
4.6 Step 5: Fundamentally Resolve by Resizing or Adding Disks
If deleting files alone isn’t enough, consider the following configuration changes.
(1) When using LVM
In environments with LVM (Logical Volume Manager), logical volumes can be easily expanded.
sudo lvextend -L +20G /dev/ubuntu-vg/ubuntu-lv
sudo resize2fs /dev/ubuntu-vg/ubuntu-lv
This allows you to increase the capacity of /.
(2) Add a new disk and mount it
Mount new storage at /mnt/data (or similar), and move large directories (e.g., /var/lib/docker or /home) there.
(3) Leverage cloud storage
Moving logs and backups to Google Drive, Dropbox, Nextcloud, etc., is another option.
4.7 Regular Checks to Prevent Recurrence
Running out of space is a problem that can be avoided by regular monitoring.
Adopting the following practices is effective.
- Regularly check
df -handdu -sh /var - Create a script to automatically check large directories
- Set up email notifications when usage exceeds thresholds (
cron+mailutils, etc.)
Simple example:
#!/bin/bash
THRESHOLD=90
USAGE=$(df / | awk 'NR==2 {print $5}' | sed 's/%//')
if [ "$USAGE" -gt "$THRESHOLD" ]; then
  echo "Disk usage on / has exceeded ${THRESHOLD}%!" | mail -s "Disk Alert" admin@example.com
fi
4.8 Summary: Prioritizing Space‑Saving Measures
| Priority | Measure | Notes |
|---|---|---|
| ★★★★★ | Delete APT cache (sudo apt clean) | Immediate effect |
| ★★★★☆ | Delete logs (sudo journalctl --vacuum-time=7d) | Safe and reliable |
| ★★★★☆ | Remove unnecessary Snap/Flatpak versions | Effective on desktop environments |
| ★★★☆☆ | Delete unnecessary Docker data | Useful for server use |
| ★★☆☆☆ | Disk expansion / mount addition | Effective as a root solution |
| ★☆☆☆☆ | Implement regular monitoring scripts | Benefits over long‑term operation |
When Ubuntu runs low on space,
Identify the heavy hitters → Delete from safe areas → Review the configuration
Following these three steps solves most issues.
5. Advanced Tips (Useful Tricks & Caveats)
Even after using the methods above to check and clean space, the disk can fill up again over time.
Here are some advanced techniques to keep Ubuntu running smoothly.
5.1 Automate Regular Disk Checks
Running df or du manually is tedious, but automation scripts can reduce the effort.
Register a simple monitoring script in cron to send alerts when usage exceeds a threshold.
Example: Script that emails when free space drops below 10%
#!/bin/bash
THRESHOLD=90
USAGE=$(df / | awk 'NR==2 {print $5}' | sed 's/%//')
if [ "$USAGE" -gt "$THRESHOLD" ]; then
  echo "Warning: Root disk usage has reached ${USAGE}%." |
  mail -s "Ubuntu Disk Warning" user@example.com
fi
Save this as /usr/local/bin/check_disk.sh and make it executable with chmod +x.
Then register it in crontab -e like this:
0 8 * * * /usr/local/bin/check_disk.sh
→ The check runs automatically every morning at 8 AM.
Handy Points
- Notifications can also be sent via Slack Webhook, LINE Notify, etc.
- Can be extended to monitor multiple mount points simultaneously
5.2 One‑liner to Find Large Files
Often, a shortage is caused by a few huge files.
The following one‑liner lists files larger than 1 GB.
sudo find / -type f -size +1G -exec ls -lh {} ; | awk '{print $9 ": " $5}'
/var/log/syslog.1: 1.5G
/var/lib/docker/overlay2/.../diff/usr/lib/libchrome.so: 2.3G
/home/user/Downloads/video.mp4: 4.1G
In this way, you can quickly find files that should be deleted or moved.
Example: Search only specific directories
sudo find /var -type f -size +500M
→ Useful for finding files larger than 500 MB under /var.
5.3 Alias frequently used commands
Typing long commands every time is tedious, so setting up aliases is efficient.
Example: Append to ~/.bashrc
alias dfh='df -h --total'
alias duh='sudo du -hsx /* | sort -rh | head -10'
alias logs='sudo du -hs /var/log/* | sort -rh | head -10'
Apply after setting:
source ~/.bashrc
Now,
dfh→ Check total capacityduh→ View top 10 folderslogs→ Investigate log sizes
You can execute such operations instantly.
5.4 Continuously monitor disk usage changes (monitoring)
When running Ubuntu long‑term, you may encounter the issue of “disk space silently increasing.”
Therefore, recording disk usage changes as a history is useful.
Example: Script to log disk usage to a file
#!/bin/bash
df -h / | awk 'NR==2 {print strftime("%Y-%m-%d %H:%M:%S"), $3, $4, $5}' >> /var/log/disk_usage.log
Running this once daily via cron lets you track disk usage trends later.
More advanced methods
- Install
collectdornetdatafor graphing - Use Prometheus + Grafana for monitoring visualization
- When on cloud, integrate with AWS CloudWatch or GCP Ops Agent
You can monitor at the operational management level without relying on GUI tools.
5.5 Beware of permission barriers
When checking or deleting disk usage, you may not get accurate results without root privileges.
Example:
du -sh /var
Even if you run this, a regular user will have some folders skipped with “Permission denied,” resulting in a lower value than the actual usage.
→ As a countermeasure, prepend sudo or operate with administrative rights.
5.6 Considerations for SSD/HDD environments
SSD environments
- To avoid unnecessary writes, run TRIM regularly with
fstrim:
sudo systemctl enable fstrim.timer
This allows the SSD to optimize deleted blocks.
HDD environments
- Logs and caches tend to fragment, so rebooting after deleting unnecessary files can be effective.
- Running I/O‑heavy
ducommands is best done during low‑load periods, such as late at night.
5.7 Systematize capacity management to prevent recurrence
Finally, the optimal solution for capacity management is habitual and systematic.
Practical checklist
- Regularly check
df -h - Check
/var/loggrowth monthly - Run
apt autoremoveweekly - Periodically delete unnecessary Snap and Docker data
- Have an automated notification script in place
If you perform these regularly, most disk space issues can be prevented.
Summary
This section introduced advanced techniques to make Ubuntu disk space management more efficient.
The key points are three:
- Early detection through automation and notifications
- Operational efficiency via aliases and one‑liners
- Safe management by considering permissions and device characteristics
Combining these transforms capacity management from a tedious task into an integral part of system operations.
6. FAQ (Frequently Asked Questions)
Q1. What is a simple way to check current free space on Ubuntu?
The easiest way is to run the following command in a terminal.
df -h
This command shows each drive (partition)’s total size, used space, and free space at a glance.
Adding the -h option displays the sizes in a human‑readable format (GB, MB).
Q2. How can I check disk usage per directory?
Use the du command.
To check a specific folder’s usage, run:
du -sh /home
Option meanings:
-s: display only the total-h: show sizes in human‑readable units
For more detailed per‑folder usage, use:
sudo du -h --max-depth=1 /var
Q3. What’s the difference between df and du?
In short, they measure different things.
| Command | Target | Primary Use |
|---|---|---|
df | Entire filesystem | Check free space |
du | File/directory level | Find where space is used |
For example, use df to see overall free space on /, and use du to see how much a specific folder consumes.
Q4. How can I check free space via the GUI?
On Ubuntu Desktop, you can visually check using the File Manager (Nautilus) or Disk Usage Analyzer (Baobab).
- File Manager → Bottom bar shows “Remaining XX GB”
- Baobab → Graphical breakdown of usage
Both are beginner‑friendly and show results with just a click.
Q5. If I get a “disk full” warning, what should I delete first?
Start by removing safe caches and unnecessary files.
The recommended order is:
- Clear APT cache
sudo apt clean - Remove unnecessary packages
sudo apt autoremove - Clean up logs
sudo journalctl --vacuum-time=7d - Empty trash and thumbnail cache
rm -rf ~/.cache/thumbnails/* && rm -rf ~/.local/share/Trash/*
These steps alone can free several gigabytes.
Q6. I heard Snap apps can bloat disk space. What can I do?
Snap keeps each version of an app, so old revisions may linger.
You can delete unnecessary old revisions with the following command:
sudo snap list --all | grep disabled | awk '{print $1, $3}' |
while read snapname revision; do
  sudo snap remove "$snapname" --revision="$revision"
done
Alternatively, you can manually remove it using the GUI tool Snap Store.
Q7. What should I do when /var or /home is too large?
/var– clean up logs (/var/log) and caches (/var/cache)/home– back up or move downloads and video files to external storage
If you need to increase capacity, you can expand the volume with LVM or mount a new disk and manage the space separately.
Q8. Running du takes a long time. Is there a way to speed it up?
du scans every file recursively, so it can be slow on directories with many items.
The following tricks can help:
- Use
--max-depth=1to skip deep sub‑directories - Exclude unnecessary folders (e.g.,
--exclude=/proc) - Use the
ncducommand (interactive view)
sudo apt install ncdu
sudo ncdu /
ncdu feels lightweight and provides a visual way to inspect disk usage.
Q9. How can I prevent running out of space again?
Regular maintenance helps a lot:
- Run
sudo apt autoremoveonce a week - Check
/var/logand/homeusage monthly - Save the output of
df -hto a log and track changes - Periodically delete old Snap or Docker data
- On SSDs, enable automatic trimming with
sudo systemctl enable fstrim.timer
Automating these tasks can keep disk‑space problems at bay.
Q10. What are my options for expanding storage?
There are three common approaches:
- Extend the LVM volume
bash sudo lvextend -L +10G /dev/ubuntu-vg/ubuntu-lv sudo resize2fs /dev/ubuntu-vg/ubuntu-lv - Add a new disk and mount it – create a mount point such as
/mnt/dataand distribute the load. - Use cloud storage – move large files to Google Drive, Nextcloud, etc.
If adding physical storage isn’t feasible, archiving old files is also effective.
Q11. Can I check disk usage without root privileges?
Basic df -h works for any user, but du needs permission to read certain directories (e.g., /var/log).
In a non‑root environment, limit the scan to your home directory:
du -sh ~/*
Q12. How do I check storage on a headless (server) system?
Since the server edition of Ubuntu lacks a GUI, use these commands instead:
| Goal | Command |
|---|---|
| Check overall usage | df -h |
| Check per‑directory usage | sudo du -hsx /* |
| Find large files | sudo find / -type f -size +1G |
| Visual, text‑based view | sudo ncdu / |
Combining them lets you analyze disk usage comfortably without a GUI.
Q13. Is there any risk of breaking the system while checking storage?
Simply checking usage carries no risk.
However, be careful when you start deleting or resizing:
- Double‑check paths before using
sudo rm -rf - Never delete system directories like
/bin,/lib, or/etc - If you’re unsure, back up first
Q14. Any hidden tricks to save space?
- Shorten log retention (
/etc/logrotate.confsettings) - Remove unnecessary language packs:
sudo apt install localepurge - Purge old kernels (they sometimes linger):
sudo apt autoremove --purge
These steps can free anywhere from a few hundred MB to several GB.
Q15. Recommended tools for monitoring disk usage?
Ubuntu offers several useful monitoring tools:
| Tool | Features |
|---|---|
| ncdu | Lightweight, fast CLI explorer |
| Baobab | GUI with visual charts |
| duf | Enhanced df with a clean table layout |
| Netdata / Prometheus / Grafana | Full‑stack server monitoring and graphing |
Summary
The key takeaways for managing disk space on Ubuntu are:
- Use
dffor overall view anddufor detailed inspection - Delete unnecessary data in a safe order (APT → logs → caches)
- Automate cleanup and monitoring to prevent recurrence
By making these practices routine, disk‑space issues become rare. Managing storage may seem mundane, but it’s one of the most critical maintenance tasks for a stable Ubuntu system.